


Before:
There’s a constant battle between the lawn and the flowerbeds. The grass is always trying to invade the flowerbeds, and we are always trying to stop it. We call this ‘edging.’ There are lots of options. Some folks sink edging blocks or even bricks into the soil. There is also metal or plastic edging that is buried in the ground.
All this is done to prevent the grass’s tillers (underground shoots) from taking hold in our landscaping and flowerbeds. Installing edging is a pain in the rear and in the case of blocks or bricks, the grass always seems to find a way through a crack. Metal or plastic edging can work, but you can never mow right up to it so you need to spend more time trimming the edge with a weed whacker or grass shears—remember those?
There is an easier way, and all you need is a shovel. I use a straight bladed shovel for a nice, neat edge. Simply slice into the grass at the edge of the bed at a steep angle 4” deep. Grass can’t cross that barrier of air, so it won’t make it into the bed on the other side of the trench. Here’s what it looks like:
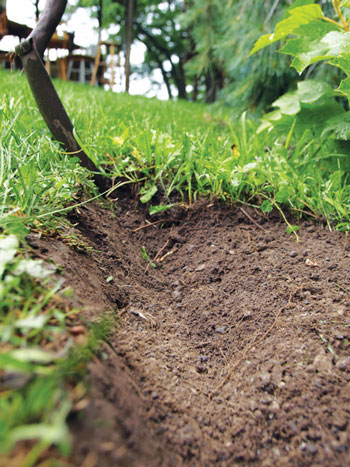
The steep cut on the left prevents the grass from crossing into the flowerbed
on the right.
This is much easier than installing blocks or rolls of edging. Best of all, I can mow right up to this edge so I don’t need to waste time weed whacking. After three or four years you’ll need to recut the edge, but it is easy and quick once the edge is established.
But wait—it gets better!
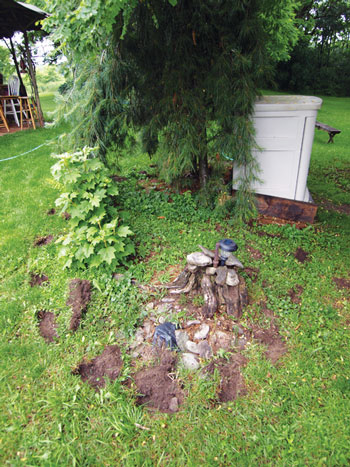
I have an area that is difficult to mow around, so I decided to turn it into a mulched bed to make mowing easier. Here’s what it looked like:
You can see the difficulty: there’s a storage bin, a couple of weeping pines, a hydrangea and a stump. It is nasty looking and darned near impossible to mow around all these obstacles.
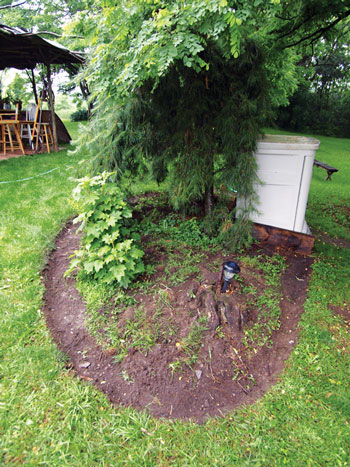
I used the hose to outline the edge I want. It will be a nice rounded bed that will be easy to mow around.
The next step is to make a few slices along the hose so I know where to make my edge.
Then I simply finish making my cut, steep in the lawn side and sloping up into the bed on the other. I just toss the clumps I dig out into the bed—why waste good soil, I say.
Here is the new bed with the cut made all the way around.
You’re probably asking, “But what about all the grass and weeds in the bed, and all the clumps of grass you tossed in?”
I suppose that I could spend a couple of hours digging out all the grass and weeds, but I have a much quicker and easier way to deal with that: cardboard!
A layer of cardboard will smother the grass and it will die. All the clumps of sod that I tossed in will compost into the soil. I’m always on the prowl for large pieces of cardboard. I was lucky that a coworker had just done some home improvement and gave me the cardboard that a new front door and some appliances came in. Here’s the first cardboard sheet going down right on top of the grass and weeds.
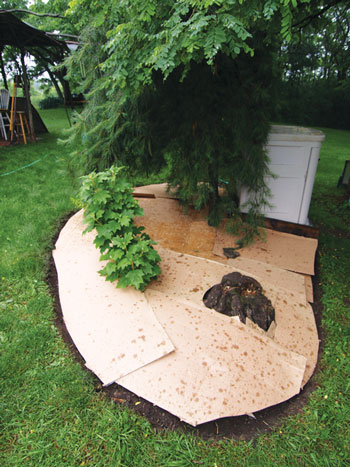
I used a razor knife to slice the cardboard along the edge of the bed. Make sure that the cardboard overlaps heavily so the grass and weeds can’t get through...8” of overlap will stop them.
I also used the razor knife to cut the cardboard so it fits around the trunks of the pines and hydrangea.
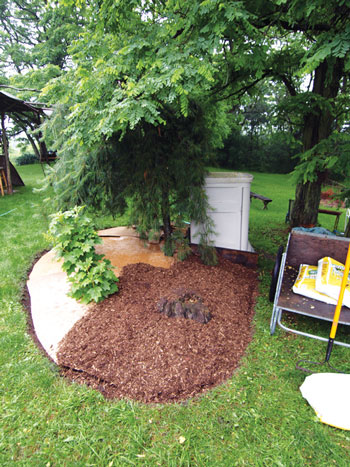
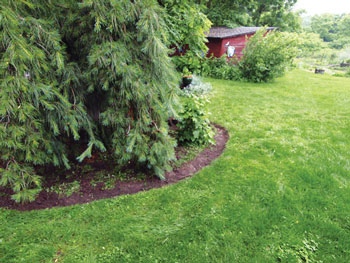
Now all that’s left is putting mulch on the cardboard. This is the fun part, and it goes down quickly. I put a 4” to 5” layer of cedar mulch down. There are many types of mulch, but I like cedar because it’s cheap and smells nice too.
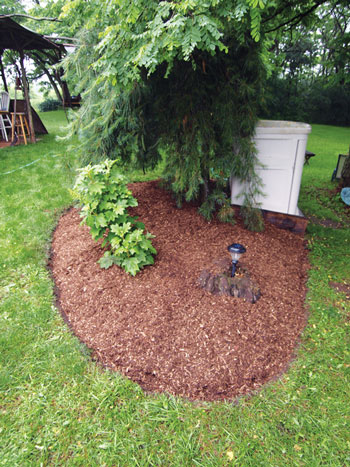
Now the mulch is down, the area looks great and mowing will be simple. It looks a little sparse now, but more plants can be added to the bed easily. Just brush the mulch aside, cut a hole in the cardboard and plant. Easy peasy, and it looks so much better now. In all, this took less than an hour, and I used seven bags of cedar mulch.
Thanks for the read.