
My Job to Carry the Torch 


Hello  my Foodie Friends!   

Let’s talk about desserts, a confectionery course that completes your meal or maybe more than that, brings joy to everyone’s face after a delicious bite. There is no denying the fact that desserts bring us some level of happiness. My father-in-law’s favorite part of the meal was the dessert. Although he would always finish everything on his dinner plate, he would have room for the anticipated dessert that was to come. I have to admit, that I have a bit of a sweet tooth as well. 

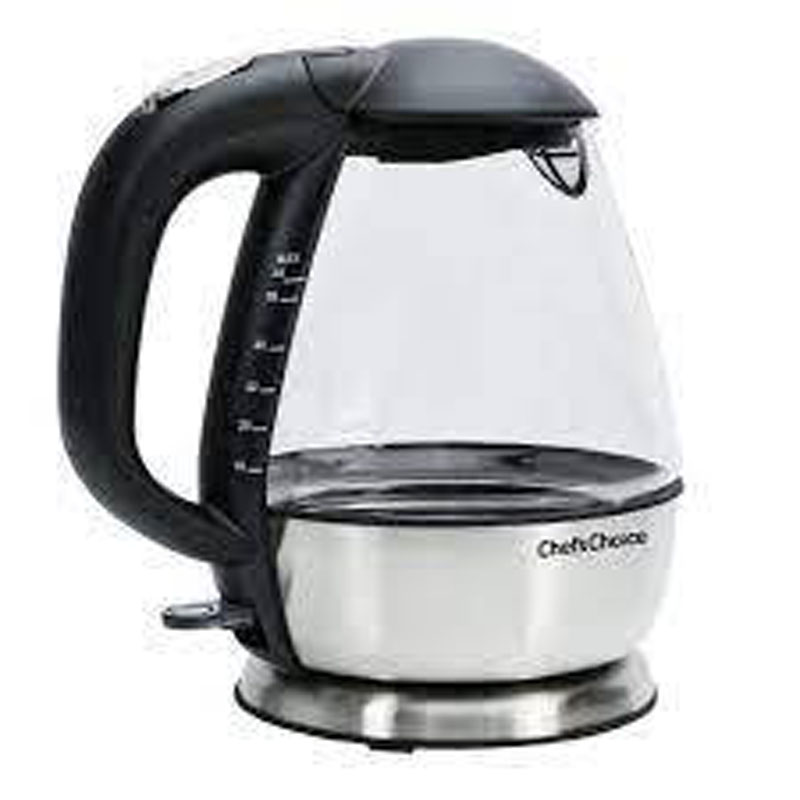
Among the plethora of baking items that our customers have been coming into the store for; the cooking torch has become a must-have kitchen accessory for any gourmet home chef. The cooking torch lets you achieve that crunchy, caramelized layer of sugar on top of your custard. The cooking torch is not limited to just crème brûleé, though. You can use it for bread puddings, baked Alaska, and even for melting cheese on top of soup. Here are some other ways to use your cooking torch: Although we love adorning fiber- and protein-packed oatmeal with fun and healthy toppings, some mornings need a little more than a drizzle of honey. Torching your toppings is the perfect way to give your oats an exciting new makeover. Not to mention, it’ll totally wake you up. Top your bowl with fat-blasting unsweetened cocoa powder and cinnamon, and torch away to lend the spices some smokiness. For those with a sweet tooth, make a simple bananas foster oatmeal by mixing a few drops of vanilla extract into the oats and then garnishing with sliced bananas, cinnamon, and honey. Then, allow the torch to caramelize the toppings. Whether you’re layering slices on sourdough or sprinkling the good stuff on a bowl of homemade French onion soup, perfectly melted cheese can be achieved in minutes with a kitchen torch. For meat that’s best served a little undone—like lamb, prime rib, and roast beef—lightly char the surface with your torch before popping the protein in the oven. This method also works well with fish. Just scald the skin on your salmon fillet for that extra bite. And for a crowd-pleasing appetizer, wrap grilled asparagus in turkey bacon and set it aflame to up the flavor factor and impress your guests before dinner is even served.

Stop by Compliments to the Chef, your Neighborhood Kitchen and Cutlery store located at 33 Railroad Place, to get the tools you need to make delicious desserts and when you are asked to “carry the torch”.  Remember my Foodie Friends; “Life Happens in the Kitchen”. 

Take Care, John & Paula

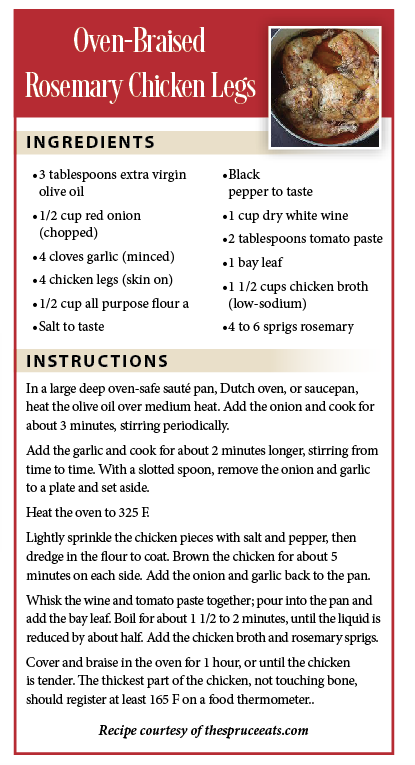
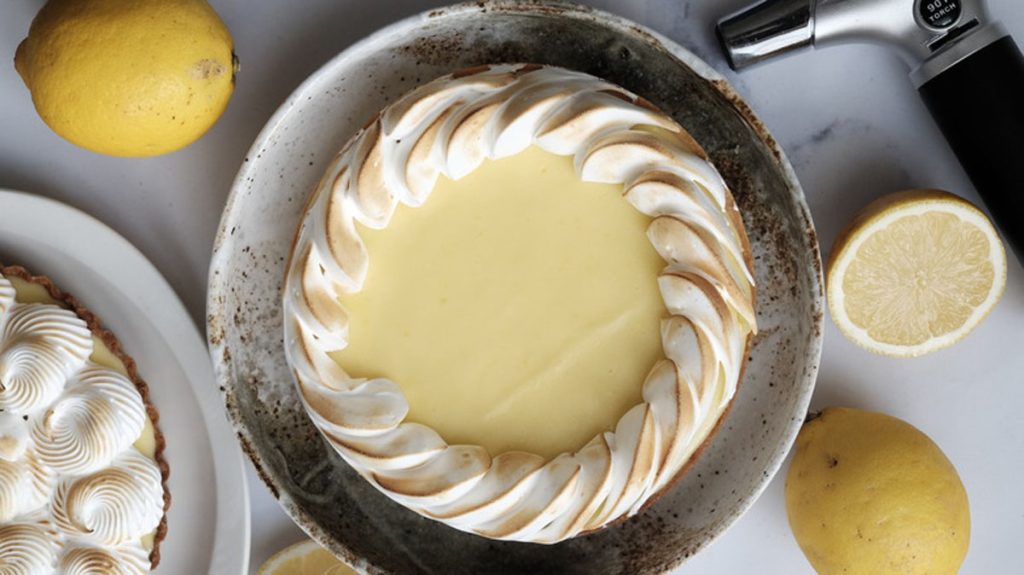
Classic Lemon Meringue Pie 


Ingredients

1 premade pie crust

4 eggs, divided

1 ½ cups white sugar

2 ½ sticks unsalted butter

1 cup lemon juice


INSTRUCTIONS

Line pie molds or tart pan with pie crust and bake at 350 F for 15 minutes, or until golden brown. To make sure the walls do not collapse, line the inside of the tart with parchment paper and weigh down with raw rice or beans.

Add 1/4 cup of sugar with 2 whole eggs and 2 egg yolks into a bowl, and whisk for 1 minute.

Bring lemon juice and 1/2 cup of sugar to a boil.

Add the hot lemon juice to the egg mixture and stir for 30 seconds. Pour the mixture back into the sauce pan and stir until it boils over medium heat.

Add butter and stir until smooth and creamy.

Pour the lemon cream into each tart crust, and freeze for 30 minutes.

Using a stand mixer, bring egg whites (2 egg whites left over from the cream) to medium peaks, and leave on medium speed.

Meanwhile, bring 3/4 cup of white sugar and 1/4 cup of water to 250 F on the stove top. Once this temperature is reached, pour the sugar syrup over the egg whites and whip on high speed until it cools down in temperature and a stiff peak is formed. This is the meringue for your pie.

Pipe the meringue over the chilled lemon tart. Optionally, toast the meringue using a cooking torch.

Serve your lemon meringue pie.

Recipe courtesy of beyonddiet.com


The Garden Before the Freeze

It’s that time of year when it’s ready to clean up the veggie garden, get it ready and prep for the beauty of spring What are the experts saying are the best steps to take?

Clean it Out: Remove the plant debris to help limit pests and disease from developing in the soil.  

Put it Away:  Gather all of the labels, stakes, cages and tools to put away for the following year.  It’s best to wash and dry everything before storing it; especially any tools.  This will help to prevent rusting.  Remove any rust with a rust cleaning product (this can be found at the local hardware store).

Add Compost: Spread a 2 to 3 inch layer of compost over the beds to help enrich the soil.  There’s no need to till it in, the seasons and organisms will do the work, but till the dirt before adding the compost layer.

Test the Soil: Test the soil before adding any fall plants and the compost.  Most remediation is done in the spring.

Fall crops:  Yes you can still plant in your garden and harvest some fall crops.  However, you do need to cover them with a small tunnel or some other light covering.  What can you plant in the fall in the north east at this late date?  Beets, Swiss chard, Cover Crops, spinach, some lettuce blends, etc.

Spring Crops Prep: 

Garlic – Prepare a bed and plant your garlic bulbs with the pointed tip facing upwards, sowing them into the soil approximately 4 inches apart and approximately 2 inches deep.  Get ready to enjoy garlic scapes and savory bulbs for cooking in the early summer months.

Asparagus – Plant the crowns of the asparagus in a prepared garden bed and get ready to watch it grow in the spring; it is a reseeding crop.  However, it takes several seasons before the asparagus is edible.

There are plenty of activities to enjoy each season of the garden for those who love to garden.  And, if you don’t, there’s always a way to celebrate the fruits/veggies of those who do enjoy the farming process at the Saratoga Farmers’ Market.

The Saratoga Farmer’s Market is open on Wednesdays from 3- 6 p.m. and  Saturdays from 9 a.m.-1 p.m. at High Rock Park in downtown Saratoga Springs. The Monday market at Clifton Park is open from 2-5 p.m. at the Shenendehowa Methodist Church on Route 146. Find us online at www.saratogafarmersmarket.org, where you can sign up for our weekly newsletter, and follow us on Facebook and Instagram @SaratogaFarmersMarket. 


Vegetable Soup

Yields: 8 servings | Prep Time: 15 min | cook time: 40 min


INGREDIENTS:

tablespoons olive oil

1 1/2 cups chopped yellow onion*

2 cups peeled and chopped carrots*

1 1/4 cup chopped celery*

4 cloves garlic, minced*

4 (14.5 oz) cans of vegetable broth (or chicken broth)

2 (14.5 oz) cans of diced tomatoes (undrained)

3 cups peeled, thick diced potatoes*

2 cups green beans, cut to bite size pieces

1/3 cup fresh, chopped parsley*

2 bay leaves*

1 tablespoon fresh thyme leaves*

1 1/4 cup fresh corn*

1 cup fresh peas*

Salt and pepper


Instructions:

Heat the olive oil in a large pot over medium to high heat. 

Add the onions, carrots, and celery and sauté for approximately 4 minutes, then add the garlic and sauté for and additional 30 seconds.

Add in the broth, tomatoes, potatoes, parsley, bay leaves, thyme and season with salt and pepper to taste.*

Bring the mixture to a boil, then add the green beans. 

Reduce heat to medium-low, cover and simmer until potatoes are almost fully tender, about 20 – 30 minutes. 

Add corn and peas and cook 5 to 10 minutes longer. Remove the bay leaves before serving.  Serve warm.

Additional Notes:

Boosting flavor

•Add more flavor by adding additional seasoning such as basil*, oregano*, rosemary*, marjoram* or Italian seasoning*.

•Use homemade chicken or vegetable broth.

•Add a parmesan cheese rind and let it simmer in the soup.  Remove it at the time of removing the bay leaves.

•Serve with grated Parmesan cheese and a splash of extra virgin olive oil.

Added Vegetables

Consider adding additional vegetables such as; butternut squash, zucchini, summer squash, etc.

Extras

•If desired, add in pasta, rice and/or beans.

•Serve with fresh baked bread* or homemade croutons from the Saratoga Farmers’ Market.

Alexa, put the Kettle on


Hello  my Foodie Friends! 

Using an electric kettle to boil water has become fashionable since they are efficient and will help you boil water in a short period. Most electrical kettles are highly efficient and will deliver instant results.

The kettle comes with an element that allows it to heat water fast and does not require that it be placed on a stove top to boil. All you need to do is to plug it into an outlet and place it on the counter and allow it to boil your water. The kettle allows the water to boil fast and come with additional security measures that allow it to turn off automatically. The fact that it turns itself off after the water has reached its boiling point means that it cannot boil dry and get damaged in the event you forget to switch the power off.

There are many reasons for convenience to use the electrical kettle being that it is specifically designed to be used to heat water. The kettle can heat more water in a matter of 2-4 minutes, making this an ideal appliance when it is used in homes. An electrical kettle can safely be used in the dormitory or a hotel room.  It is important for students who would prefer to make a cup of tea fast and catch up with a lesson early in the morning. It is portable and can easily be kept in the cardboard. You can use an electric tea kettle to heat water for French press coffee.

At Compliments to the Chef, one of our favorite electric kettles is the Chef’s Choice Electric Kettle to assist with brewing tea or coffee.  Drinkers who love white and green tea will find it rewarding once they buy it. The kettle is designed to prevent incorrect brewing that often leads to unpleasant harshness and bitterness. It is sensitively designed to allow the tea to boil to a correct temperature that meets the needs of tea takers. Chef’s Choice offers the highest of quality and technology in kitchen appliances, especially with the electric kettle. Chef’s Choice’s design conceals heating element so that it is never in contact with water.  This ensures that there is no objectionable build- up of mineral deposits.  

Stop by Compliments to the Chef, your Neighborhood Kitchen and Cutlery store located at 33 Railroad place for the tools you need for your autumnal delights. As for the title of the article, Alexa answers my questions and “listens in” to my conversations. Enjoy your quiet time having a cup of tea. Remember my Foodie Friends, “Life Happens in the Kitchen”. 

Take Care,
John & Paula

Weekend Roast =Easy Weekday Meals

Learning how to roast a chicken is a basic cooking skill.  And, if you prepare it on a weekend, you can make quick and easy meals during the week.  

Once you’ve roasted the chicken and let it rest, de-bone it and keep the chicken in an airtight container, refrigerated, so it’s ready to finish off a few meals in 30 minutes.

Here are just a few ideas to use the prepared chicken;

Chicken BBQ Sandwiches

Chicken Tacos, taquitos or enchiladas

Chicken Tortellini Soup

White Chicken Chili 

Chicken salad and more…

The options are endless
to explore! 

The Saratoga Farmer’s Market is open on Wednesdays from 3- 6 p.m. and  Saturdays from 9 a.m.-1 p.m. at High Rock Park in downtown Saratoga Springs. The Monday market at Clifton Park is open from 2-5 p.m. at the Shenendehowa Methodist Church on Route 146. Find us online at www.saratogafarmersmarket.org, where you can sign up for our weekly newsletter, and follow us on Facebook and Instagram @SaratogaFarmersMarket. 

“Life is a Combination of Magic & Pasta”


Hello  my Foodie Friends!   

Autumn is here and the cooler weather often triggers our desire for pasta. There is something about eating carbohydrates, creamy sauces, and earthy autumnal vegetables that makes the autumn season ideal for pasta consumption. No matter what they contain, fall pasta dishes must be warm, they must be hearty, and, above all, they must be deeply satisfying. My love for pasta stems from growing up in an Italian-American household where pasta was always a staple in many of the meals we had. I often times reflect on the joys of growing up with an Italian family such as: when your friends came over, they were asked no fewer than six times if they wanted something to eat; Frank Sinatra or Dean Martin played in the background while everything was being cooked; leftovers were stored in Polly O ricotta containers; and, yes, we were all guilty of talking with your hands. One of my favorites is remembering when I was little, mine, and my four other siblings favorite way to help was making home made pasta with Nonni (my grandmother). After we washed our hands, we were allowed to help if we were quiet and didn’t fight with each other. Very hard! The luckiest kid got to guide the pasta as Nonni rolled the pasta through the machine. Stirring her secret pasta sauce with the wooden spoon was a close second. I am certain you can visualize what the kitchen smelled and looked like during this process. Once the pasta was made, the dish created and all were seated, it was always a struggle getting Nonni to actually join the table and eat. I’ve tried to carry on these traditions with my own children. 

Making homemade pasta is a fun event to get the entire family involved with. One important tool to have when making homemade pasta is a Pasta machine. A pasta machine is used to create laminated pasta. They typically consist of two stainless-steel rollers with adjustable settings, which knead and stretch the pasta dough. Pasta machines are often sold with an additional removable cutter that creates pasta shapes such as spaghetti and linguini. There are also many different attachments available, from different-shaped cutters to attachable motors.  

Consider pasta as a meal that brings you together as a family from start to finish. We’ve learned from our older generations and teach our younger generations. No matter what you’re looking for, pasta and noodles have become entwined with culture, history, and more importantly in our lives and families. Stop by Compliments to the Chef, your Neighborhood Kitchen and Cutlery Store located at 33 Railroad Place in Saratoga Springs. We carry all types of tools to assist you with making your pasta: Pasta machines, pasta drying racks, ravioli stamps and forms, pasta rollers, pastry cutters, pasta pots, and so much more.  Remember my Foodie Friends; “Life Happens in the Kitchen”.  Make those magical culinary moments happen.

Take Care,
John & Paula


Homemade Pasta Dough


Ingredients

 3 cups Flour spooned and levelled

 4 large eggs 

 1 egg yolk 

1. Place the flour on a clean work surface, make a well in the middle and add the eggs.

2. Using a fork whisk the eggs whilst slowly incorporating the flour until combined and looks like a very rough dough. You may need to use your hands once most of the egg is incorporated to help it along.

3. Bring the dough together with your hands to form a ball. Knead the dough for 10 minutes until smooth and pliable. Wrap the dough in cling film and leave to rest for 30 minutes, out of the fridge.

4. Once the dough is rested it’s time to roll it out. Cut the dough in half so it’s easier to roll out and flatten it with the palm of your hand so it will fit through the first setting on the pasta machine, usually 0. 

5. Pass the dough through the widest setting once then fold one side over the other. Flatten the dough with the palm of your hand again so it will fit through the widest setting and roll it through again.

6. Repeat this process folding the sides in and passing it through the widest setting four times. Once you’ve done that pass the dough through each setting once from the widest to the second last setting (number 7)

Recipe courtesy of Emily Wyper Inside the Rustic Kitchen at insidetherustickitchen.com

Make Your Own Pumpkin Puree 

   There’s nothing like taking advantage of the fresh items coming into season at the Saratoga Farmers’ Market.  Small pumpkins are starting to arrive just in time for the Pumpkin Festival this weekend.  Now is the perfect time to grab these items and begin to process them for the upcoming holidays; or this week’s recipe share.

Did you know that making your own pumpkin puree can actually be an easy process?  Here’s the simple steps to making this fresh goodness;

Remove the stem.

Cut the pumpkin in half lengthwise. 

Remove the seeds and guts of the pumpkin.

Place the pumpkin halves face down on a parchment lined baking sheet.

Bake in a 375 degree preheated oven for 35-40 minutes; until the pumpkin is tender.  Note: Test by pricking it with a fork.

Scoop the cooked flesh out of the pumpkin skins.  

Blend the cooked pumpkin in a food processor; you may need to add 1 to 2 tablespoons of water to create the desired consistency.

Your homemade pumpkin puree can replace a can of pumpkin puree in any given recipe.

The best way to store homemade pumpkin puree longterm is by measuring and freezing it. The best way to store it short term is by keeping it refrigerated for up to one week.

Don’t forget to join the Saratoga Farmers’ Market this weekend for the Great Pumpkin Festival this weekend.  The giant pumpkins will be on display at the parking garage, there will be live music and so many other fabulous activities including;

* Pumpkin painting starting at 9 am to benefit the market

* Cooking demo at 10:30 AM with Gianna Marie Pennacchia from Cornell Cooperative Extension

* Festival of lanterns at the market

* Amazing vendors throughout High Rock Park including special guest artists

The Saratoga Farmer’s Market is open on Wednesdays from 3- 6 p.m. and  Saturdays from 9 a.m.-1 p.m. at High Rock Park in downtown Saratoga Springs. The Monday market at Clifton Park is open from 2-5 p.m. at the Shenendehowa Methodist Church on Route 146. Find us online at www.saratogafarmersmarket.org, where you can sign up for our weekly newsletter, and follow us on Facebook and Instagram @SaratogaFarmersMarket.


Pumpkin Pasta Sauce 


Yields: 8 servings | Prep & cook time: 30 min
INGREDIENTS:


*Ingredients  currently available at the farmers’ market

2 tablespoons unsalted butter

1 (15-ounce) can crushed or diced tomatoes**

1 (15-ounce) can pumpkin puree**

1 tablespoon granulated sugar

2 teaspoons apple cider or white wine vinegar

1 teaspoon kosher salt

1 teaspoon onion powder*

1/2 teaspoon dried parsley*

1/4 teaspoon dried rosemary*

1/4 teaspoon dried sage*

1/4 teaspoon garlic powder*

1/4 teaspoon freshly ground black pepper

1/4 teaspoon cayenne pepper

1/4 cup heavy cream

Cooked pasta, for serving 

Place 2 tablespoons unsalted butter in a small microwave-safe bowl and microwave in 30-second increments until melted, about 1 minute.

Place 1 (15-ounce) can crushed or diced tomatoes and their juices, 1 (15-ounce) can pumpkin purée, 1 tablespoon granulated sugar, 2 teaspoons apple cider or white wine vinegar, 1 teaspoon kosher salt, 1 teaspoon onion powder, 1/2 teaspoon dried parsley, 1/4 teaspoon dried rosemary, 1/4 teaspoon dried sage, 1/4 teaspoon garlic powder, 1/4 teaspoon black pepper, and 1/4 teaspoon cayenne pepper in a blender and blend until smooth.

Transfer to a medium saucepan. Cook over medium heat until heated through and the flavors meld, 5 to 10 minutes. If the sauce has a faint tin-like aftertaste, cook for 5 to 10 minutes more. (The sauce will reduce more but will still be enough for 1 pound pasta.) Add 1/4 cup heavy cream and stir to combine.

Toss with al dente pasta to coat, using a little reserved pasta cooking water to help loosen the sauce if needed.

RECIPE NOTES

Make ahead: The sauce can be refrigerated in an airtight container for up to 3 days.

Freezing: Portion out the sauce into 1/2-cup or 1-cup servings and freeze in airtight containers for up to 6 months.

**Tomatoes at the Market: Purchase fresh tomatoes to make your own crushed or diced tomatoes.

**Pumpkin at the Market: Purchase fresh pumpkin(s) to make your own pumpkin puree.

Football Season at the Market

The Saratoga Farmer’s Market has everything you need to create the perfect menu for football season.  The options are endless whether you are tailgating, having friends over or celebrating with the fam.

Always hot and on trend crowd pleasing nibbles to consider;

Chili: a great make ahead 

Sliders: burgers, pulled pork, sloppy Joe’s and more

All things chicken wings: traditional, buffalo, bbq, asian style 

Dips: hummus & veggies, chips & dips, bread and buffalo chicken wing dip, guac 

Sandwich trays or a make your own smorgasbord 

Charcuterie boards with a theme 

Old-fashioned ribs and steak cut potato fries

Stuffed breads or French bread pizzas

Taquitos or a taco bar

Deviled egg buffet with toppers: bacon, sausage, scallions, sautéed mushrooms, etc

Salads: tossed, potato, spinach, cowboy caviar and more

You can put your twist on the menu list, because there’s so many delicious discoveries at the market.   And, don’t forget the cocktails, drinks and desserts.

Visiting the market for your game day festivities brings that fresh bite to the table with all things locally grown and produced; ultimately supporting your local small businesses.

The Saratoga Farmer’s Market is open on Wednesdays from 3- 6 p.m. and  Saturdays from 9 a.m.-1 p.m. at High Rock Park in downtown Saratoga Springs. The Monday market at Clifton Park is open from 2-5 p.m. at the Shenendehowa Methodist Church on Route 146. Find us online at www.saratogafarmersmarket.org, where you can sign up for our weekly newsletter, and follow us on Facebook and Instagram @SaratogaFarmersMarket.

Keep the Gloves On

Hello  my Foodie Friends!   

Home cooking is on the rise nationwide, whether people are naturals in the kitchen or not. We’re getting creative and adapting recipes, trying our hand at new skills. From the family that is now spending more time eating together to the novice cook learning to prepare more complicated meals, it’s a time of experimentation in the kitchen that isn’t without its risks. The kitchen might be a more dangerous place than you think. With a variety of sharp items like knife, blades, slicers, or chopper and heating tools that you have to use to prepare a meal, there is a risk of being injured anytime. Based on current statistics, cuts, punctures, slips, abrasions, and burns are among the most common injuries that you may suffer in the kitchen when your hands are not protected. What should you do to prevent these happening?

Making the best cut resistant gloves always available in your kitchen is the best way to protect yourself and your family from sustaining injuries when doing the cooking.

Cut-resistant gloves protect the wearer from lacerations and some punctures caused by handling sharp items, such as metal and glass. Knit gloves are made of materials that protect against a range of cut risks, from handling light cardboard to appliance assembly. Leather cut-resistant gloves have a liner or cut-resistant stitching to protect workers’ hands. Keep in mind – cut resistant gloves are not cut proof however, will save your hand from lacerations. Wear cut-resistant gloves when you’re using knives—particularly for more intricate knife work or when cutting something awkward like a knobby piece of ginger—or when cleaning food out of the blade of your food processor. I personally wear a cutting glove every time I use my mandoline slicer and my Microplane grater and sometimes when I’m feeling cautious using a knife.

We carry various brands of cut resistant gloves. One of our favorites is the Microplane cut-resistant glove. No more shredded knuckles when you grate or zest. This knit mesh glove is made of a unique synthetic fiber that resists cuts to protect your hands, and made of a seamless, wire-free knit material that resists cuts. The glove fits either hand and one size fits most.

Stop by Compliments to the Chef, your Neighborhood Kitchen and Cutlery Store located at 33 Railroad Place for those cool tools for cooks. Remember to be safe when “making the cut”.  Stay safe and healthy. Remember my Foodie Friends, “Life Happens in the Kitchen”.

Take Care, John & Paula

“It’s the Simple Things”

I often remember my mother telling me; “It’s the simple things”. The point that she was trying to make to me was to enjoy the small things in life that and to be grateful for them. It is the simple thing we do for people. The idea behind this phrase is that it’s not the grand gestures or big events that make our lives better, but rather the small, everyday moments that add up and create a positive impact.

Cooking your favorite meal can be one of those small things that makes you and others happy. Whether you love the process of cooking (adding spices, sprinkling in herbs, and taste-testing every five minutes) or just enjoy the delicious meal at the end of it, cooking your favorite dish is so much fun. 

Our kitchen arsenal can include so many tools that are essential to making our meals. However, it can often times be the most simple and basic ones that offer versatility in our day-to-day prep. One tool that many of our customers ask for is the Kwik-Cut chopper. The Kwik-Cut manufacturing company is actually out of Mohawk, New York! The tooth edge chopper is our #1 seller! The most popular uses are mixing tuna fish or egg salads. Also, it can be used for chopping fruits, nuts and vegetables, blending pastry, or tenderizing steak. The plain edge chopper has an aluminum handle and a stainless-steel blade. The most popular use is as a biscuit cutter but it can also be used for chopping fruits, nuts and vegetables or blending pastry. 

• Kwik Kuts Serrated Food Chopper for mincing and chopping nuts, fruits and vegetables, tenderizing meat, cutting cookies, biscuits, pastries, and more

• Proudly made in America; stainless steel chopping ring measures 2.875-inch x .75-inches, wide handle is comfortable and keeps fingers out of harms way

• Simply use up-and-down motion until desired texture is achieved; tenderize meat and blend pastry dough; saves time during food preparation

• Chop fruit, nuts, vegetables, salads, tuna, hard boiled eggs, onions, coleslaw, potatoes, and more; great for quick healthy snacks

• Sturdy, durable, easy to use and clean; will never rust; much easier to clean than a food processor; simply hand wash in warm, soapy water

The simplest things in life hold far better meaning and significance.  Preparing home-cooked meals or making on of your culinary specialty creations.  Showing you care doesn’t require expensive gifts or showy gestures. It’s the simple things from the heart that really count. Stop by Compliments to the Chef, your Neighborhood Kitchen and Cutlery store located at 33 Railroad Place for the simple tools for those meals that come from the heart. Remember my Foodie Friends, “Life Happens in the Kitchen”.

Take Care, 

John & Paula

Autumn at the Market

The September weather has arrived and with the crisp fall mornings the market emerges with an entirely new vibe for a brand new season to celebrate all things local.

There is wide variety of fall vegetables and fruits finding their way to displays, ginger has arrived with the anticipation of turmeric, mums are beginning to appear and soon gourds and pumpkins will make their annual debut.

September market activities are also starting to roll out.  Mark your calendars to visit the market and experience some of the scheduled events and programs;

September 14th 

Amazing vendors

Cooking Demo at the market porch with Carolyn Shapiro from Comfort Food Community at 10:30 am

Live music with Craic Agus Ceol and Thomas Powers

Saratoga Springs Friends of the Library Book Sale

Developing Minds Kids Activity from Skidmore

Master Gardeners from Cornell Cooperative Extension on site to help you prepare your garden for fall

September 21st 

Amazing Vendors

Live Music with Brendan Daily and Kate Blain

Developing Minds Kids Activity from Skidmore

Master Gardeners from Cornell Cooperative Extension on site to help you prepare your garden for fall

Comfort Food Community on site with CDPHP Farmers’ Market coupons – learn about the program and eligibility 

September 28th – The Great Pumpkin Festival and The First Annual Festival of Lanterns (display in the pavilions)

Amazing vendors 

Live Music with Happenstance, Alex Ciarullo (9-10:30 am) and The Acorns (11:30-12:30)

Cooking demo at the market porch with Gianna Pennacchia from Cornell Cooperative Extension at 10:30 am

Pumpkin Painting for Kids under the market awning (green shed – minimal charge)

Lantern making activity for Kids sponsored by the Saratoga Springs Library (free)

The Great Pumpkin Fest at the garage on High Rock with the Saratoga Chamber of Commerce

Artist guest Sarah Straight

Bikeatoga Pop-up Repair Shop at the market

Master Gardeners from Cornell Cooperative Extension on site to help you prepare your garden for fall

Comfort Food Community on site with CDPHP Farmers’ Market coupons – learn about the program and eligibility 

The market looks forward to celebrating all things local with you this fall.  Stay tuned for October events to be released soon.

The Saratoga Farmer’s Market is open on Wednesdays from 3- 6 p.m. and  Saturdays from 9 a.m.-1 p.m. at High Rock Park in downtown Saratoga Springs. The Monday market at Clifton Park is open from 2-5 p.m. at the Shenendehowa Methodist Church on Route 146. Find us online at www.saratogafarmersmarket.org, where you can sign up for our weekly newsletter, and follow us on Facebook and Instagram @SaratogaFarmersMarket.


One Pan Roasted Chicken with Fall Vegetables


Yields: 4 servings | Prep & cook time: 45 min

INGREDIENTS:

*Ingredients  currently available at the farmers’ market

1 pound butternut squash, chopped*

8 ounces baby red potatoes, halved*

8 ounces baby carrots, peeled*

8 ounces Brussels sprouts,  halved*

2 tablespoons olive oil

2 tablespoons balsamic vinegar

2 cloves garlic, minced*

Kosher salt and freshly ground black pepper,  to taste

2 tablespoons chopped fresh parsley leaves*

For the Chicken 

8 bone-in, skin on chicken thighs*

1 teaspoon oregano*

1/2 teaspoon thyme*

1/2 teaspoon basil*

1/4 teaspoon rosemary*

Kosher salt and freshly ground black pepper,  to taste.

Preheat oven to 400 degrees.  Lightly oil a baking sheet or coat with nonstick spray.

Season chicken with oregano,  thyme, basil, rosemary, salt and. Pepper, to taste; set aside.

Place butternut squash, potatoes, carrots and Brussels sprouts in a  single layer onto the prepared baking sheet. Stir in olive oil, balsamic vinegar and garlic;  season with salt and pepper, to taste.  Top with seasoned chicken in a single layer.

Place into oven and roast until the chicken is completely cooked through, reaching an internal temperature of 165 degrees, about. 25-30minutes.* Then broil for 2-3 minutes,  or until caramelized and slightly charred.

Served immediately,  garnish with parsley if desired.

* Cooking time will vary depending on the size and thickness of the potatoes. 

* Optional additions to consider include; broccoli, green beans, acorn squash, zucchini, summer squash, kale, craisins©.